EACH LIGHTSABER HILT WAS DESIGNED AND BUILT BY HAND to match the original props and models as closely as possible. Most began with a core of LEGO® SNOT (Studs Not On Top) bricks, allowing us to add detail from multiple angles. We often used elements like dishes, wheel hubs, and cylinder pieces to capture specific features.
The blades were constructed from thousands of Transparent Clear round LEGO plates, enabling the LED lights to shine through. For the Darksaber, we used Black LEGO plates and tiles with Transparent Clear elements wedged between them to create its unique look.
LEGO® BRICKS
BUILD HOURS
LUKE SKYWALKER'S LIGHTSABER
The iconic Star Wars Lightsaber! Originally wielded by Anakin Skywalker, this Lightsaber appeared in 7 of the 9 main trilogy films, and was one we knew we had to get right.
The sleek design made for a relatively straightforward build, though replicating the curved emitter at the top was especially tricky. The colour variation in the hilt allowed us to incorporate Flat Silver LEGO elements, which we rarely get to use.
LEGO® BRICKS
BUILD HOURS
YODA'S LIGHTSABER
Yoda’s hilt is much smaller than others, only 4 LEGO studs in diameter, which imposed some limitations. We built a near-cylinder for the wider black section using 2 x 2 quarter-round bricks spaced a brick apart. The blade emitter shroud is mounted on a bracket, allowing it to be constructed on a different axis than the rest of the hilt.
LEGO® BRICKS
BUILD HOURS
COUNT DOOKU'S LIGHTSABER
Count Dooku’s hilt has a unique curved shape, shifting between 45 and 35 degrees along its length.
We used LEGO SNOT bricks to recreate the upper curve, offsetting each layer by a bracket’s thickness. This staggered build packed a ton of interior work into a tiny space.
The blade emitter and long “tooth” were angled using clips attached to bar plates.
LEGO® BRICKS
BUILD HOURS
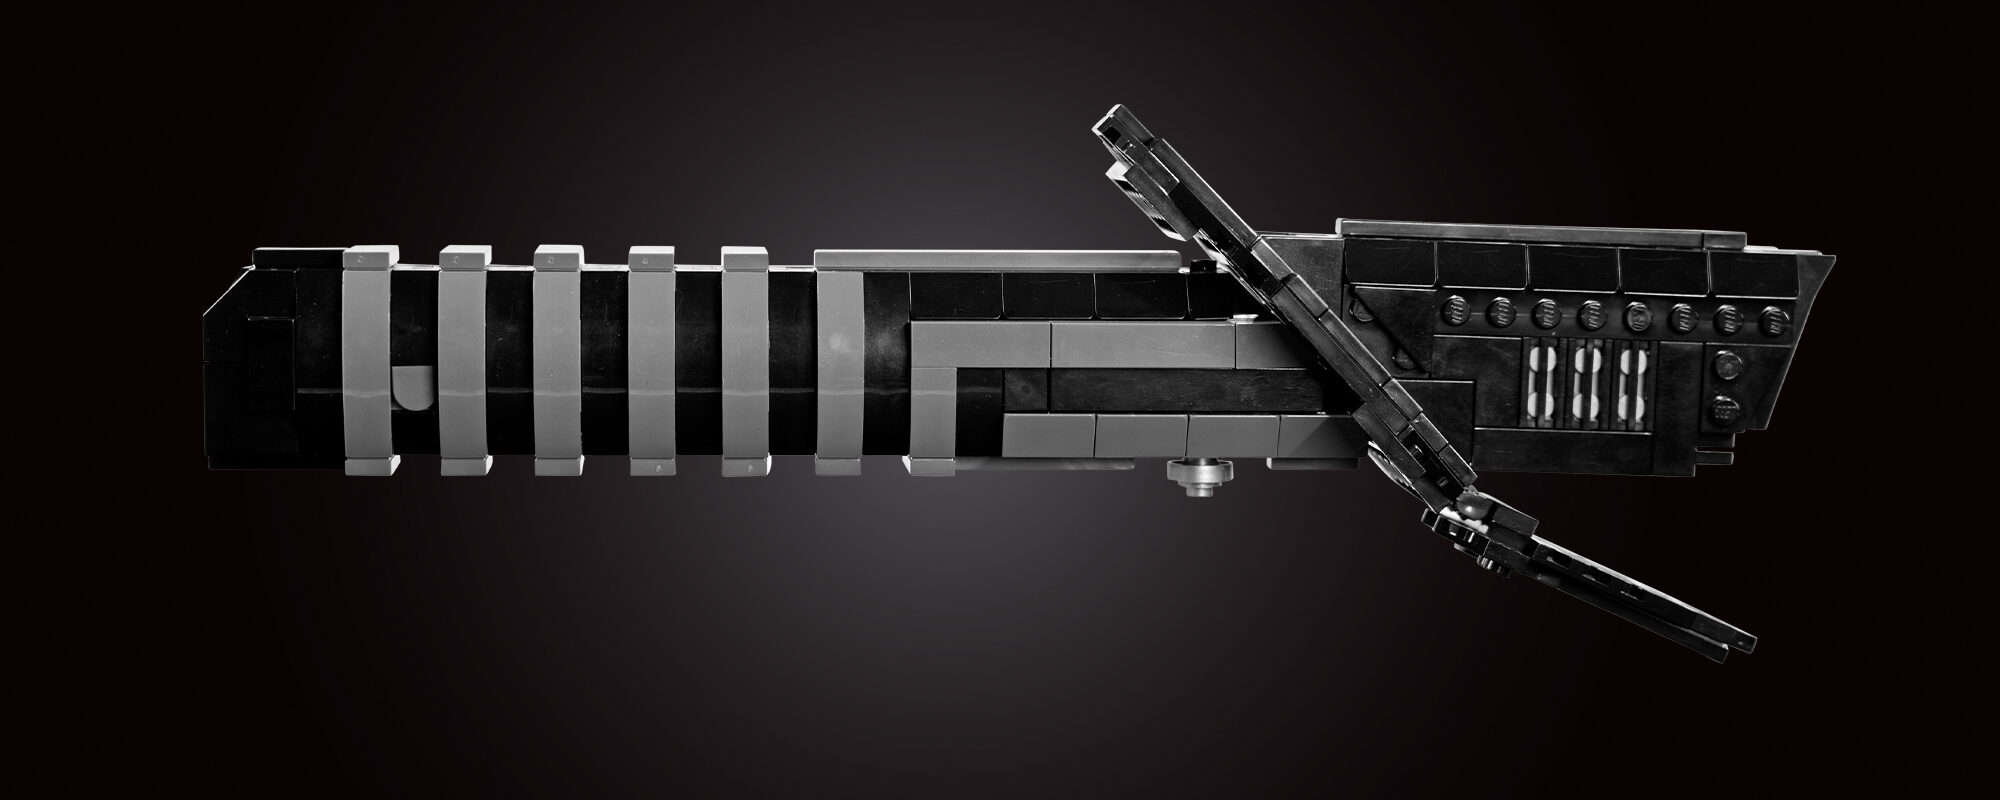
DARK SABER
Unlike traditional lightsabers, the Darksaber feels like a Japanese katana, with a straight, angular hilt and an oval-shaped handle. We used curved slopes over an internal SNOT frame to capture that shape.
The cross-guard was tricky, but we cracked it by threading a LEGO Technic™ axle through the guard and into both halves of the hilt.
LEGO® BRICKS
BUILD HOURS
OBI-WAN'S 3RD LIGHTSABER
This design was split into multiple joined sections. The emitter end was straightforward, utilising various round and dish elements. The activator section was the most complex, requiring six detailed sides. We solved it using 1 x 1 plates with three bar connectors from LEGO NINJAGO™ weapons. This approach also worked for the lower twelve-sided portion.
LEGO® BRICKS
(for all four)
BUILD HOURS
(for all four)
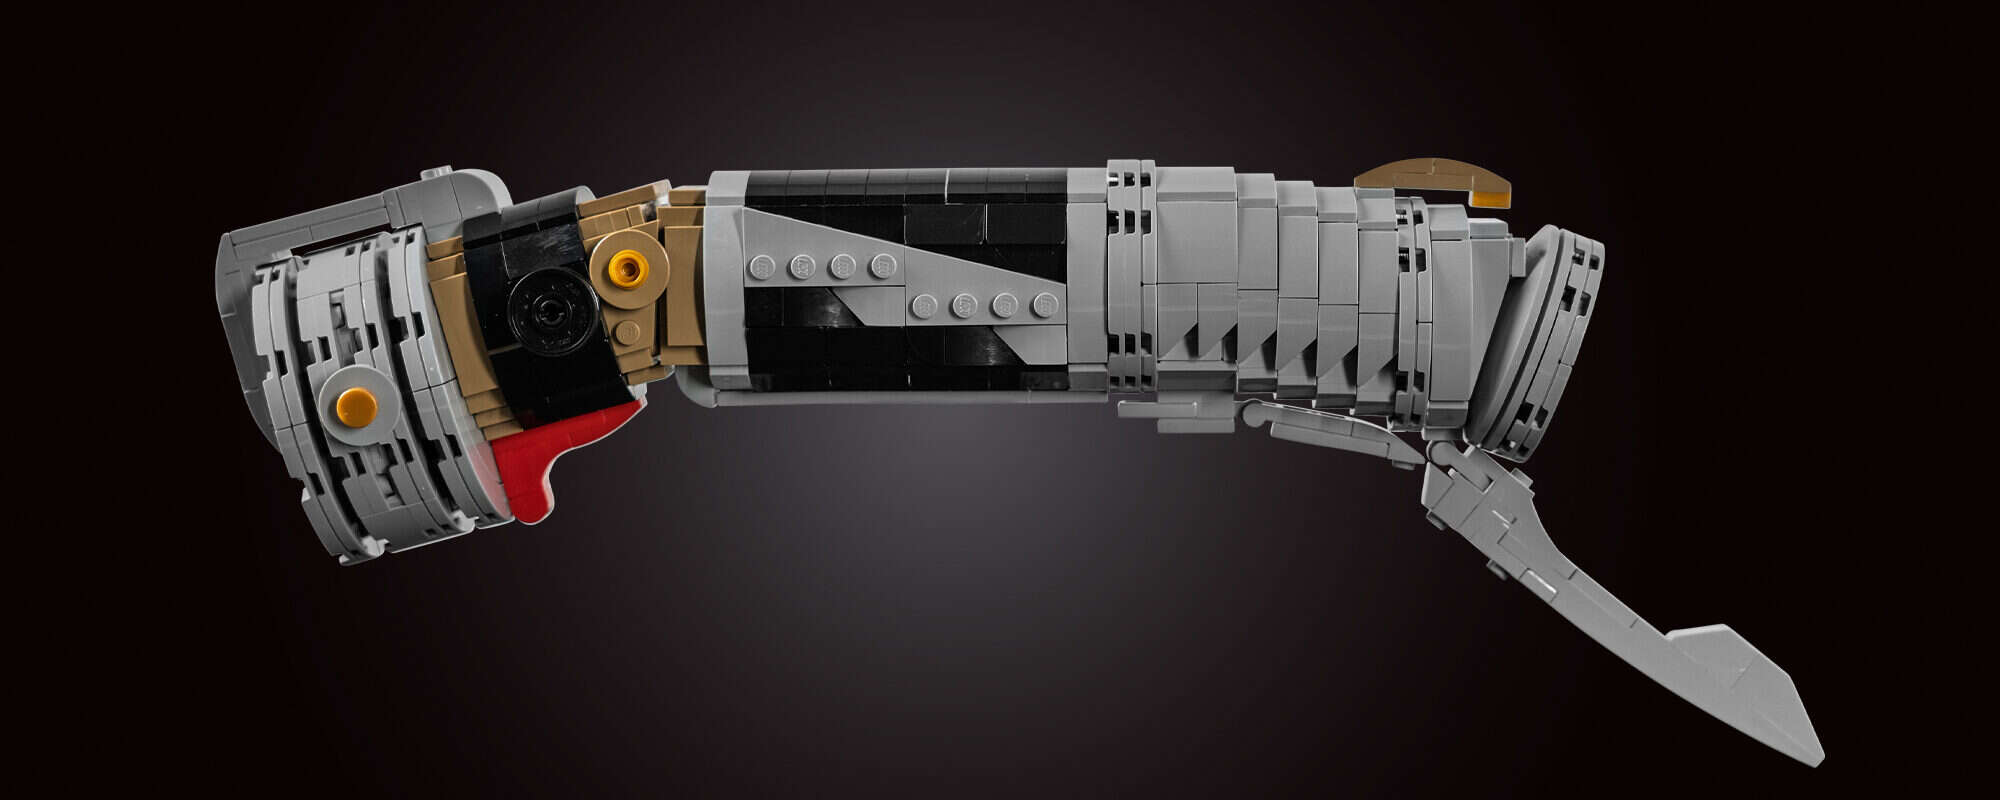
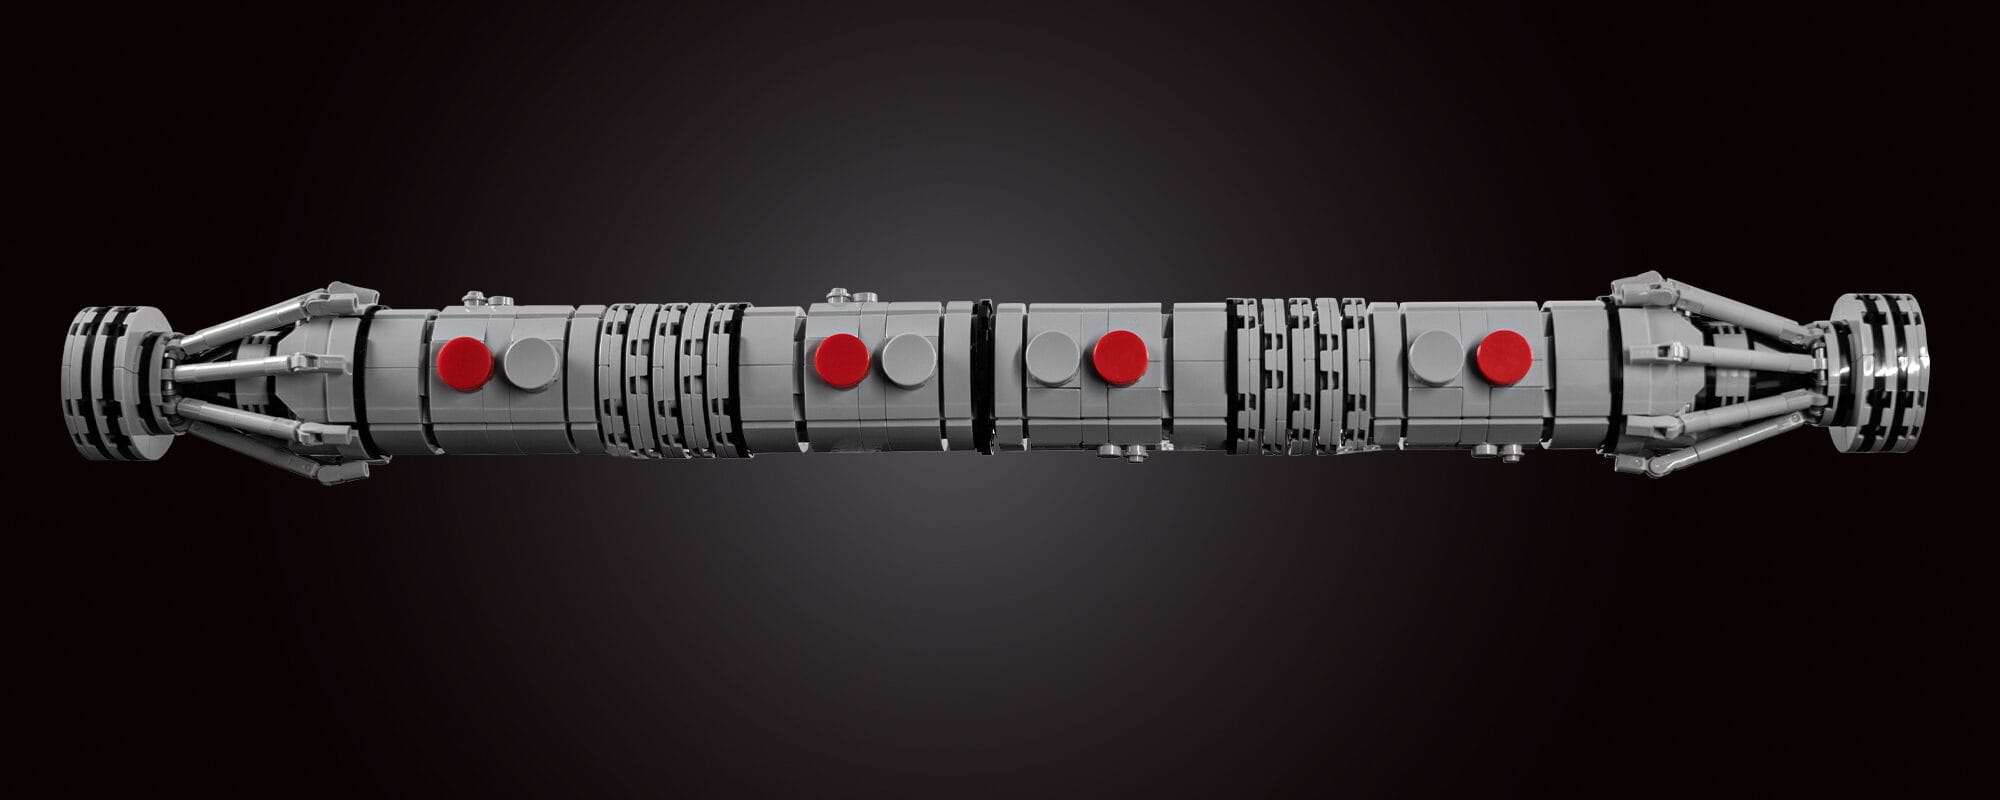
GRIEVOUS' COLLECTION
For our Grievous vs Obi-Wan scene, we picked the most visually distinct Sabers that stayed true to the source material.
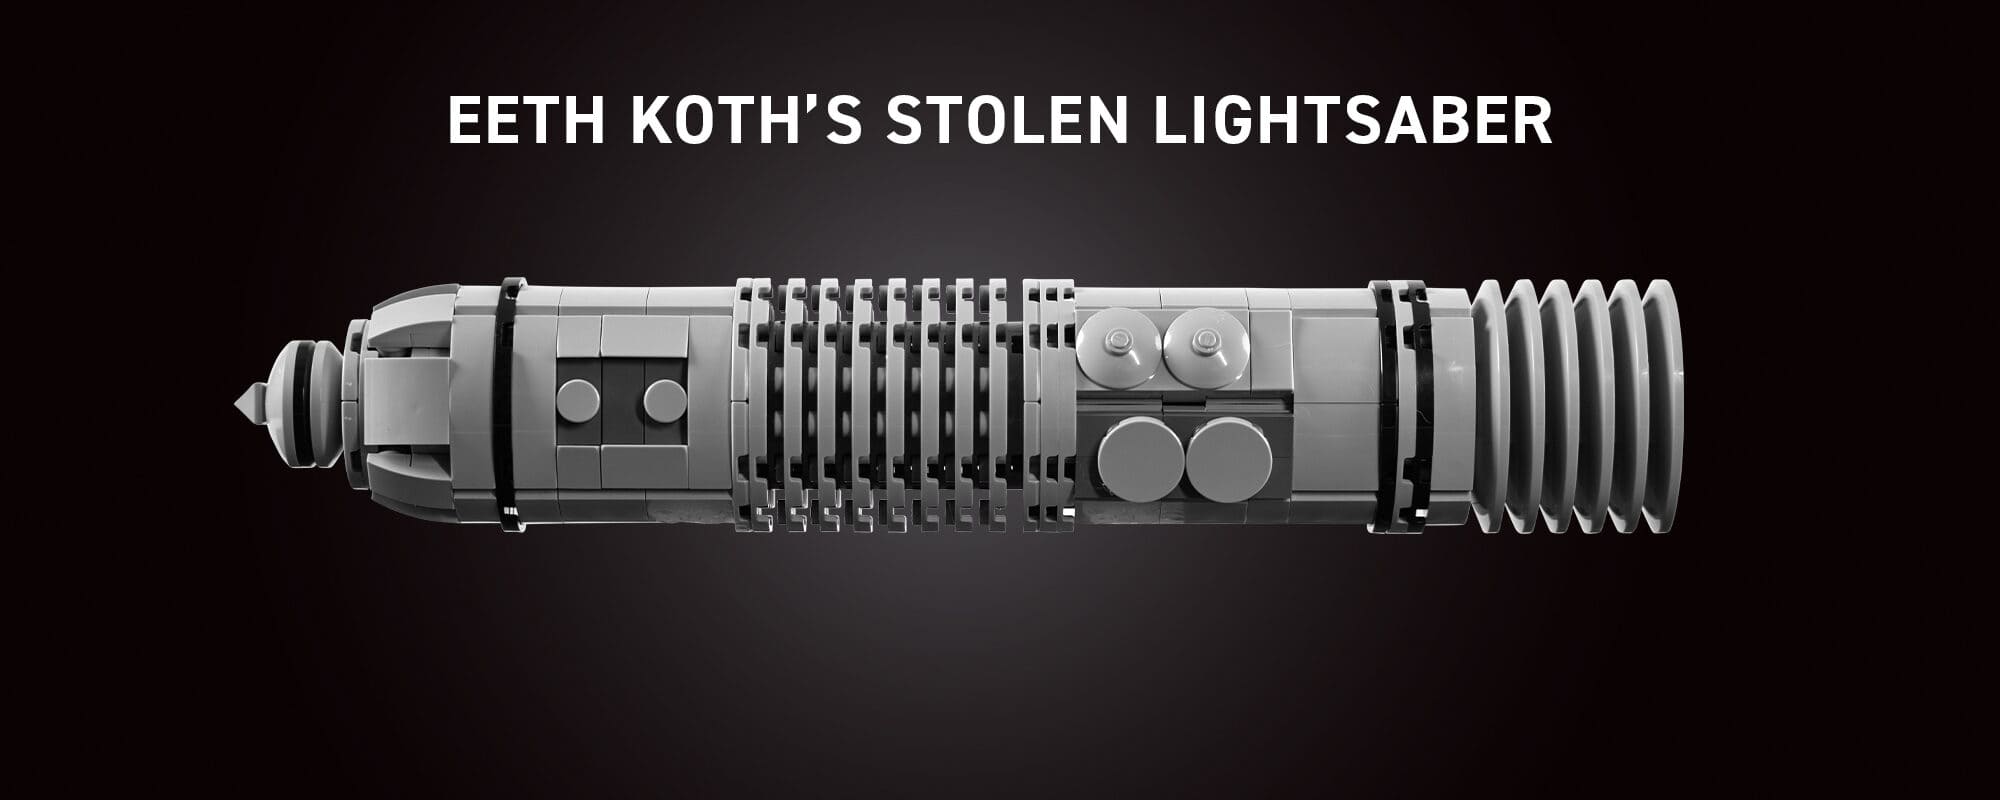
We settled on four hilts: Adi Gallia (blue), Roron Corobb (green), Eeth Koth (green), and Pablo-Jill (blue). Eeth Koth’s hilt added the most variety to the display wall, so we featured that one, but we also built all four, plus the four in Grievous’s hands.
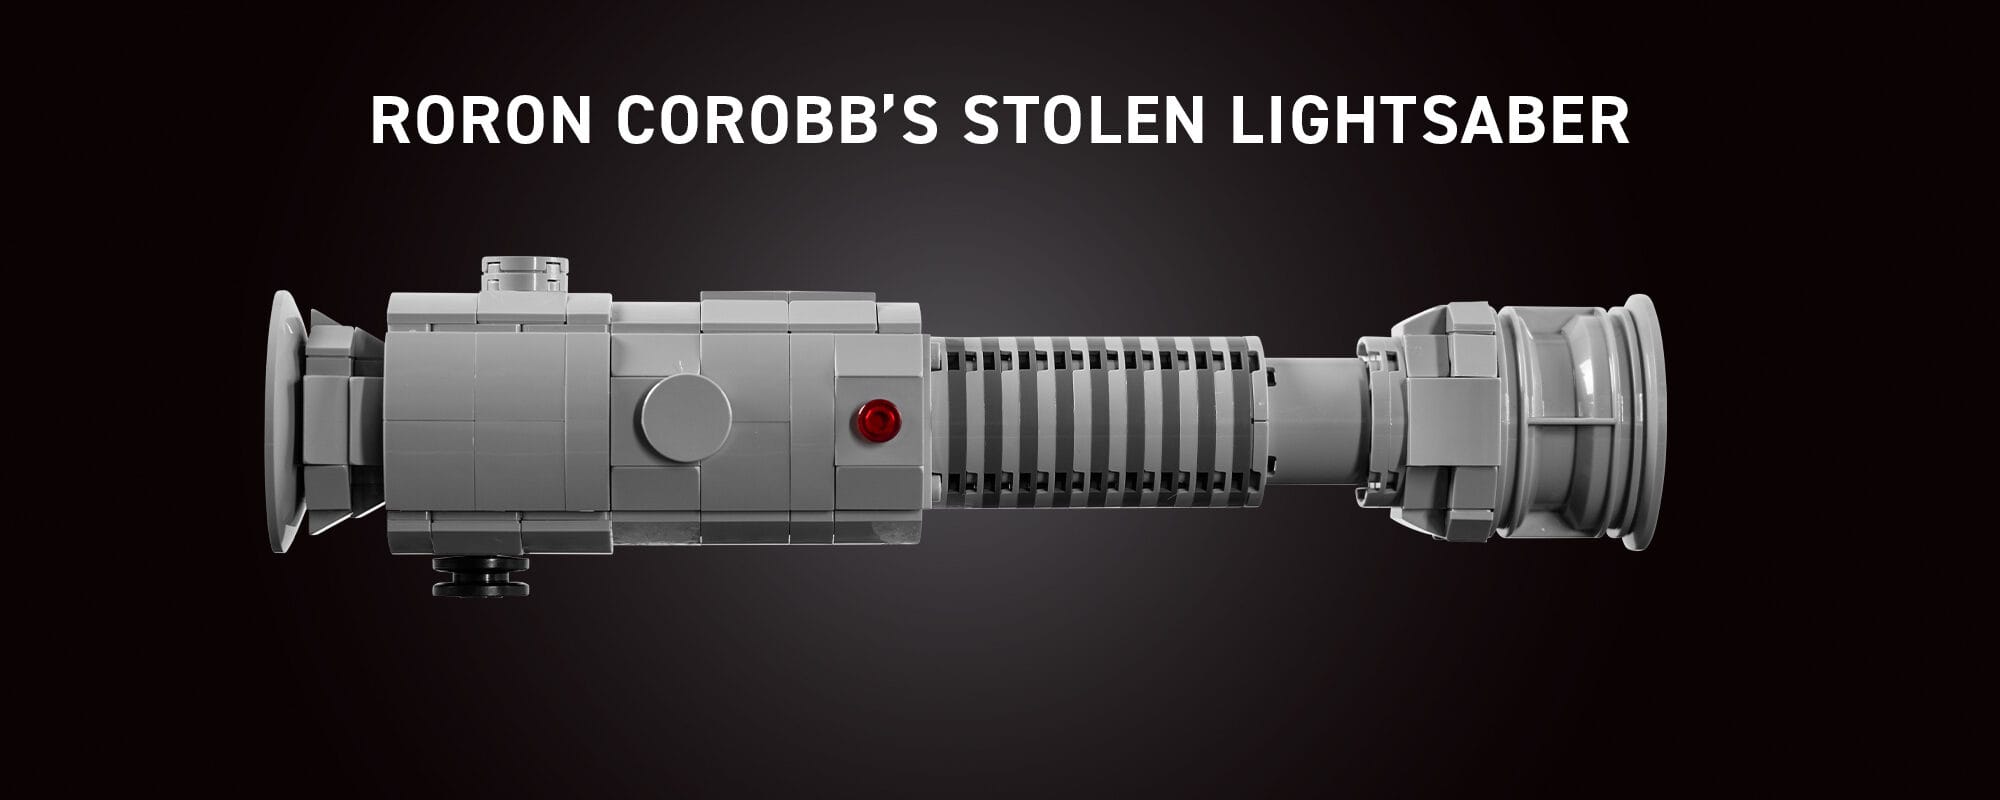
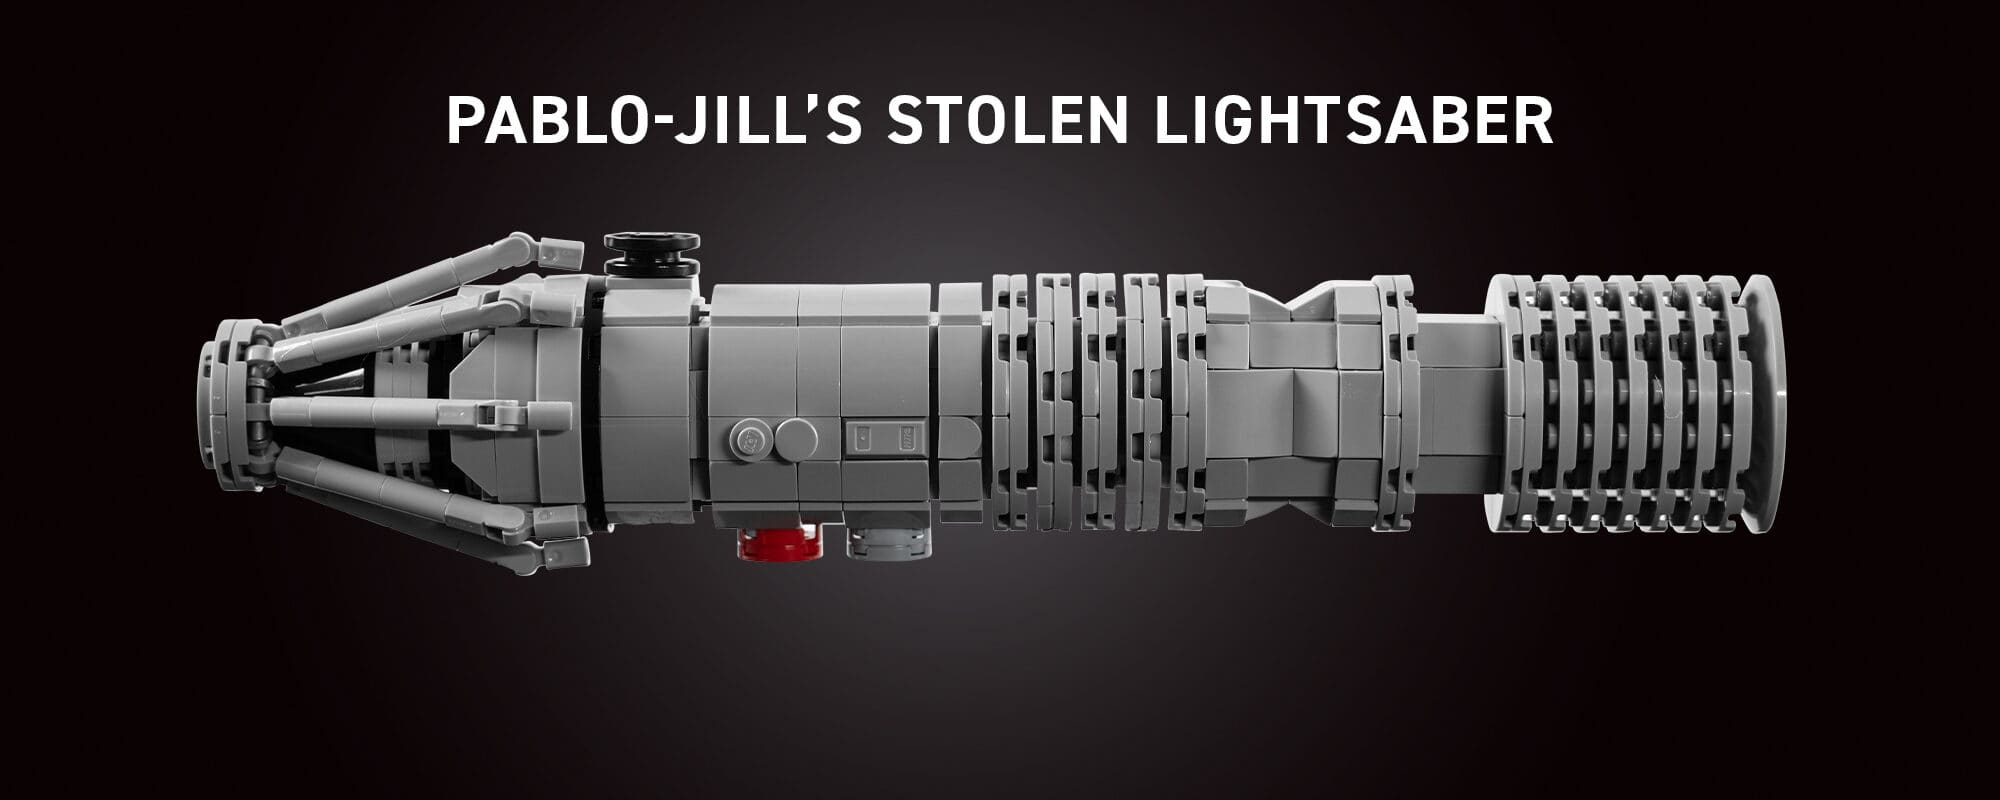
Eeth Koth’s Saber was simple, aside from off-centre buttons mounted on LEGO hinge bricks. Pablo-Jill’s hilt echoed Darth Maul’s, so we reused some of those techniques. Roron Corobb’s build features a car wheel just under the emitter!
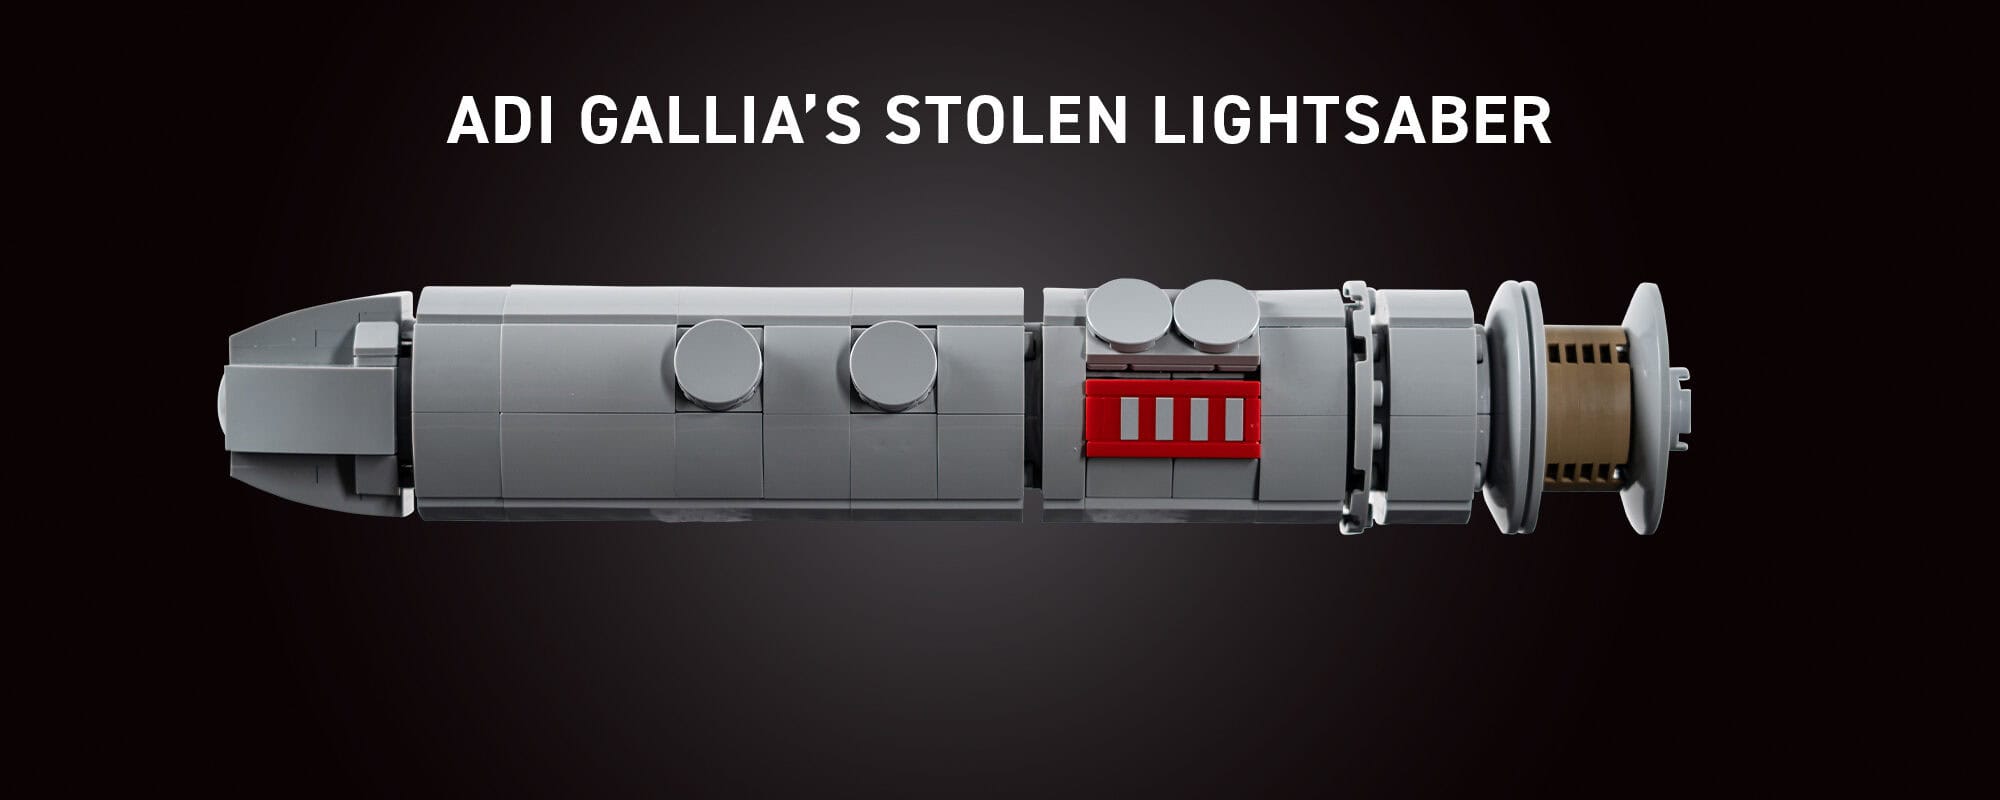
Adi Gallia’s Saber turned out to be the trickiest—her red-striped detail with misaligned buttons meant we had to rotate the entire lower half of the hilt to make it work.
LEGO® BRICKS
BUILD HOURS
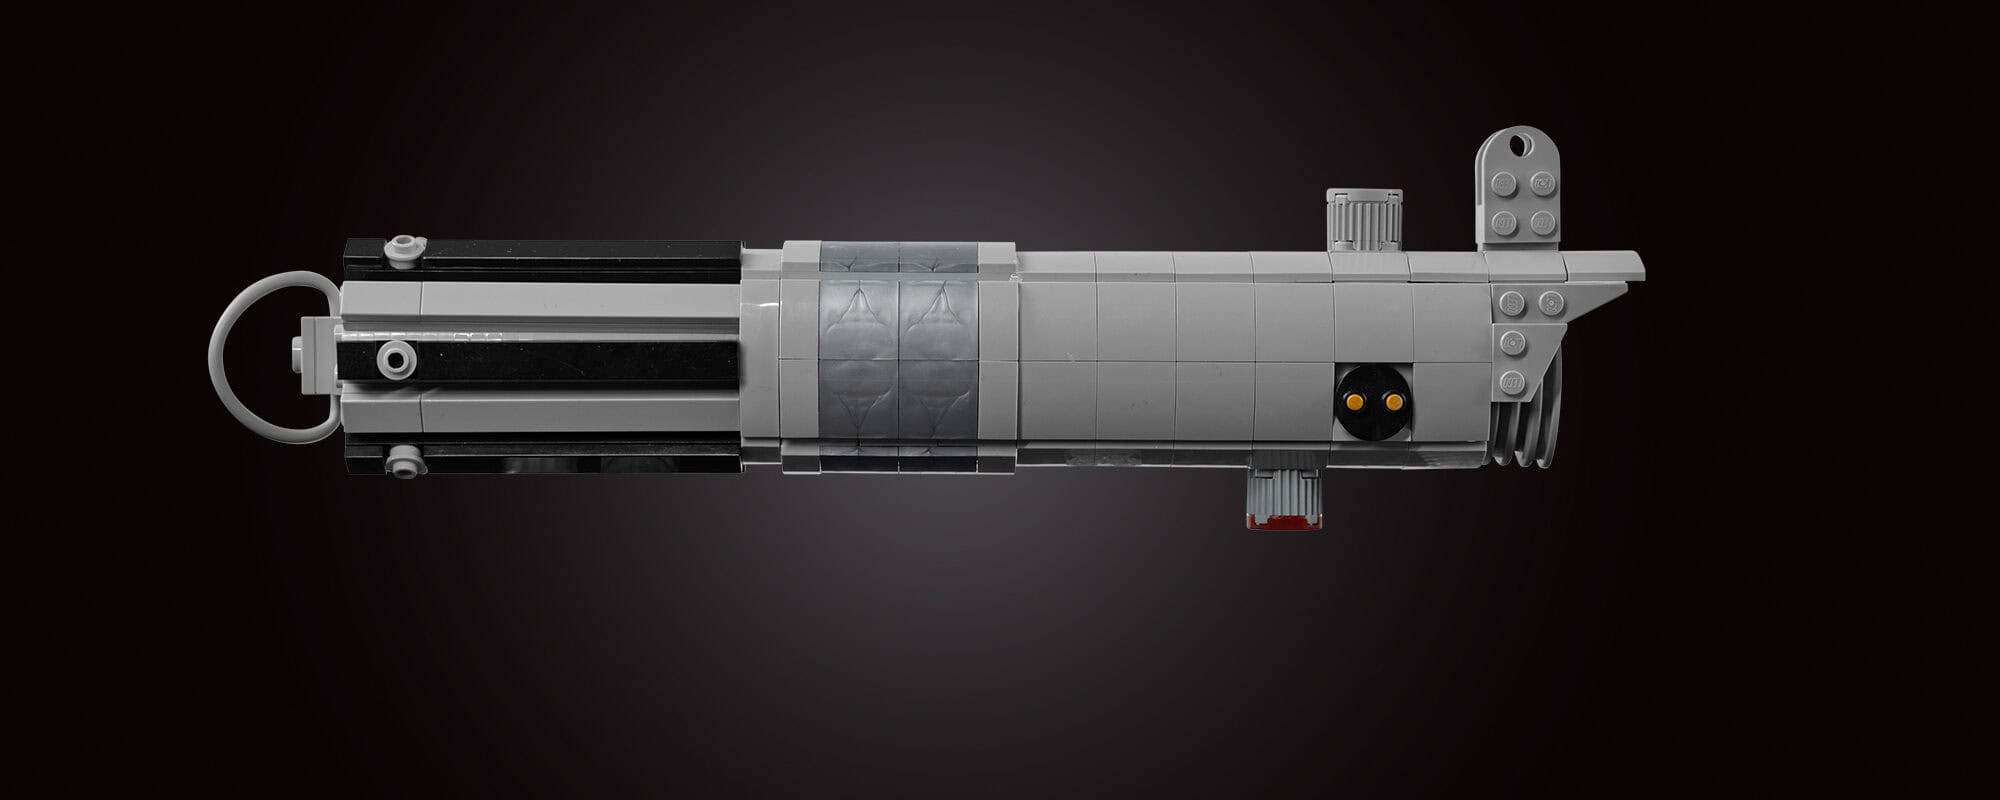
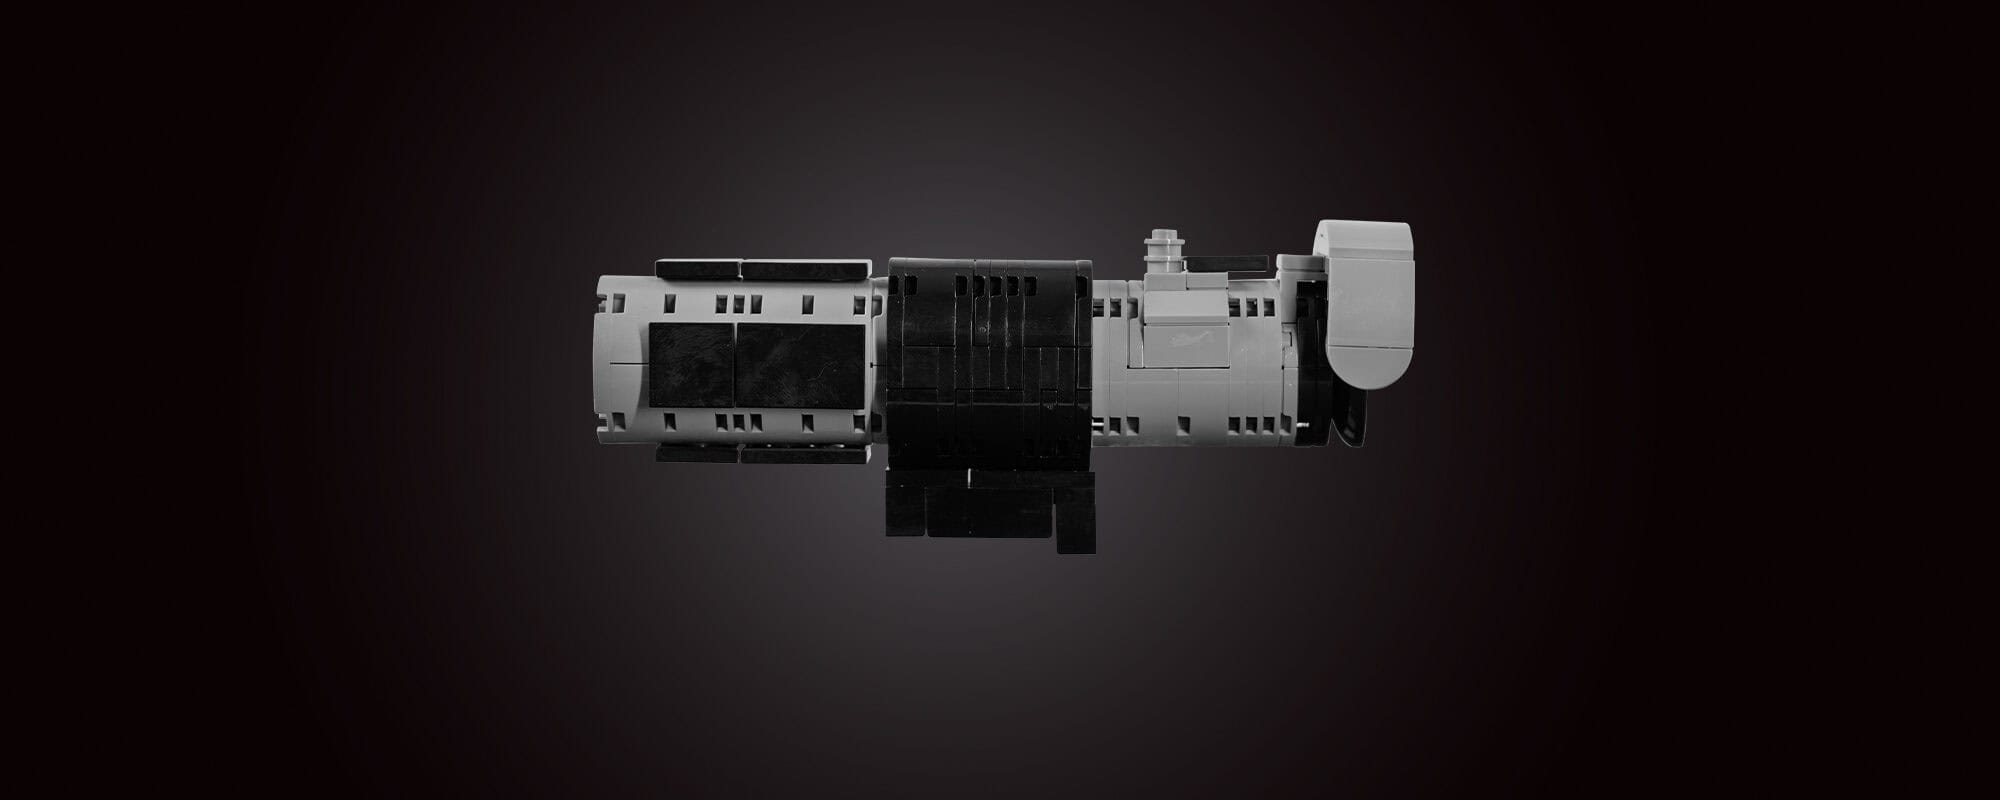
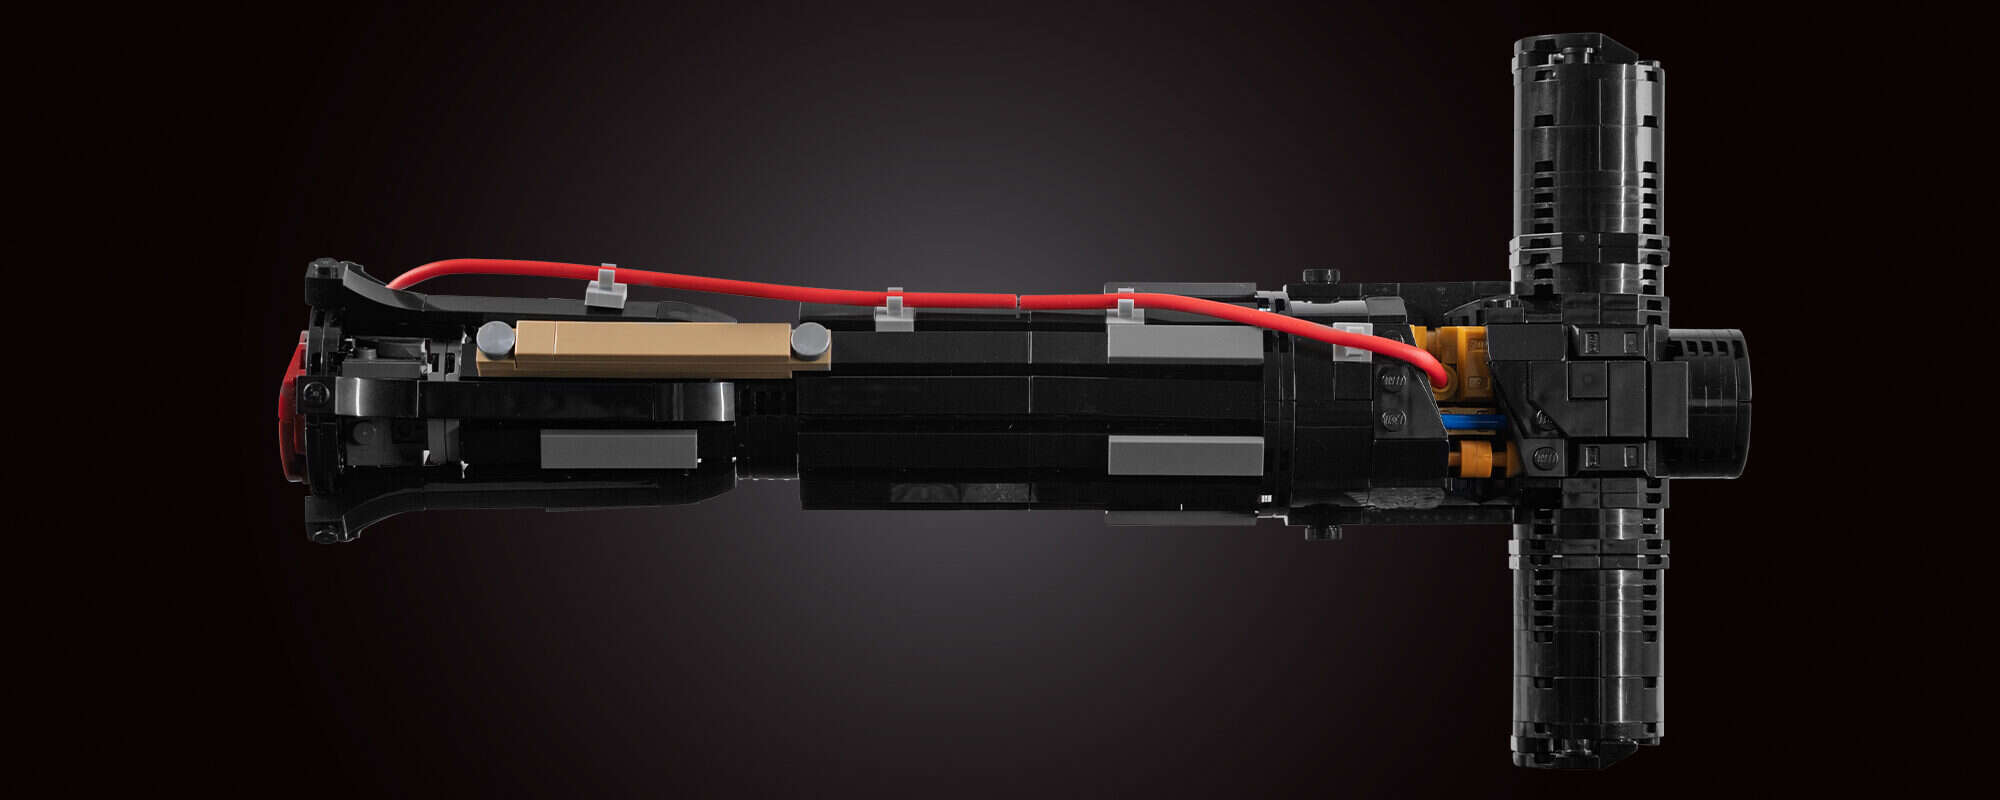
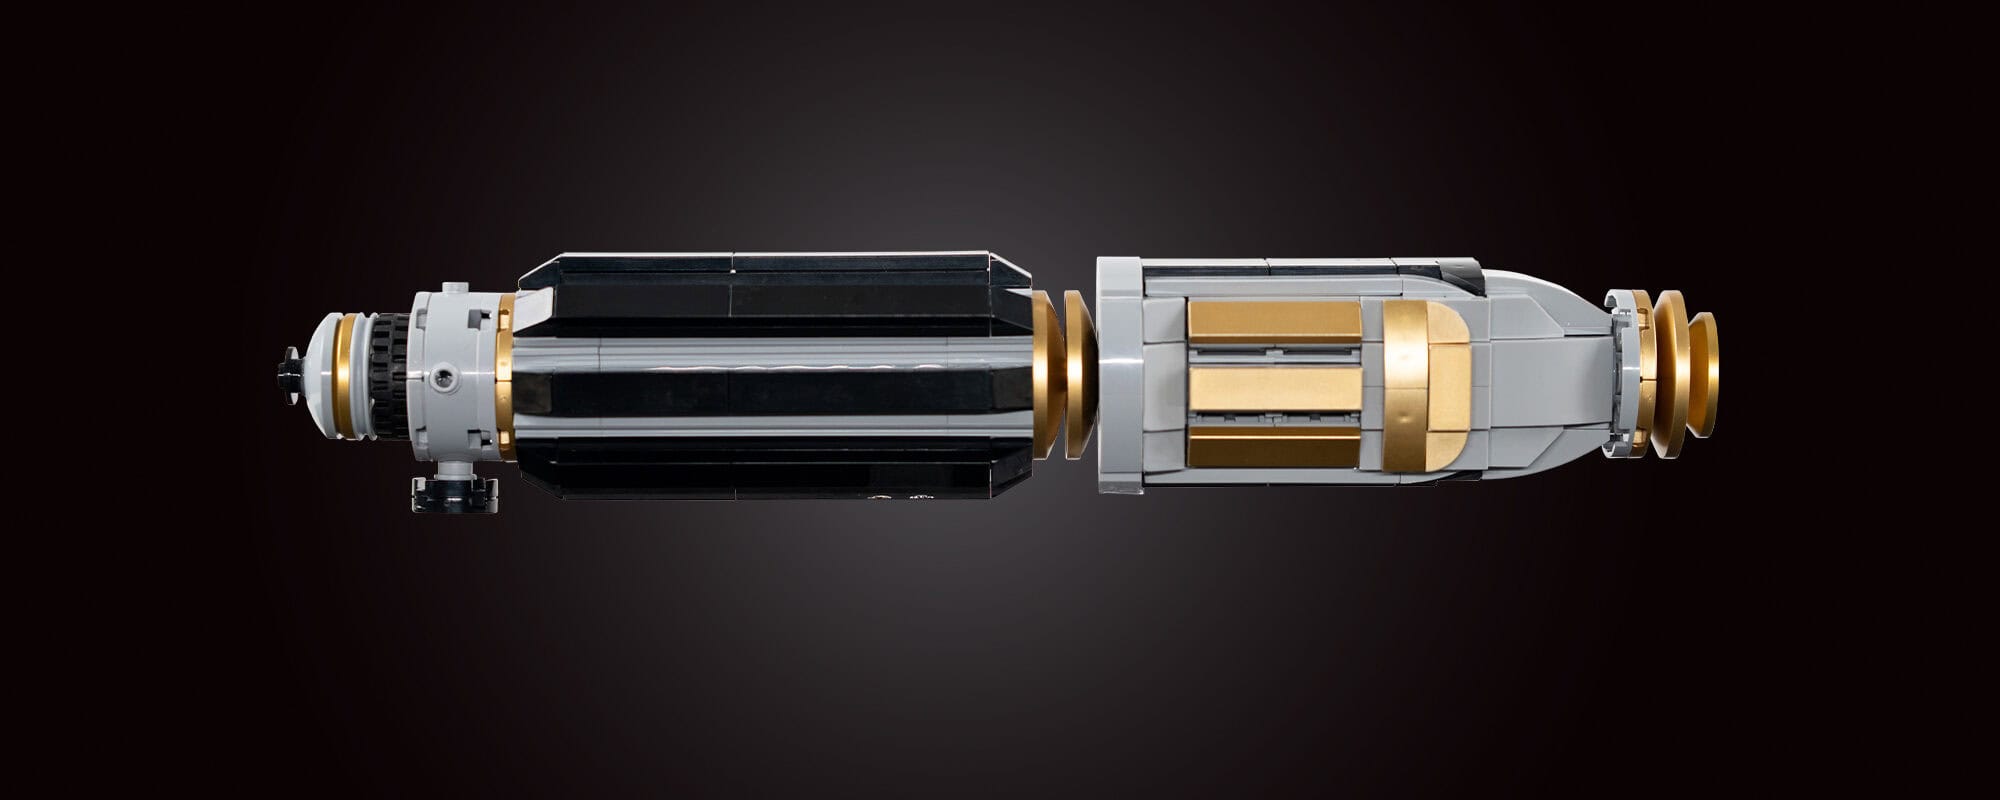
DARTH VADER'S LIGHTSABER
We used the same 12-sided cylinder technique we developed for Luke’s Lightsaber on Vader’s, but with longer panels. The 1 x 1 crystal tiles from the LEGO Dots line were perfect for the activator lights.
Vader’s hilt features exposed wiring loops, but flex tubes didn’t fit the spacing. After some trial and error, we placed rail plates and tiles sideways to get the look right.
We went back to LEGO brackets and SNOT bricks for the emitter, topping it off with black wedge plates to shape the smooth, rounded peak.
LEGO® BRICKS
BUILD HOURS
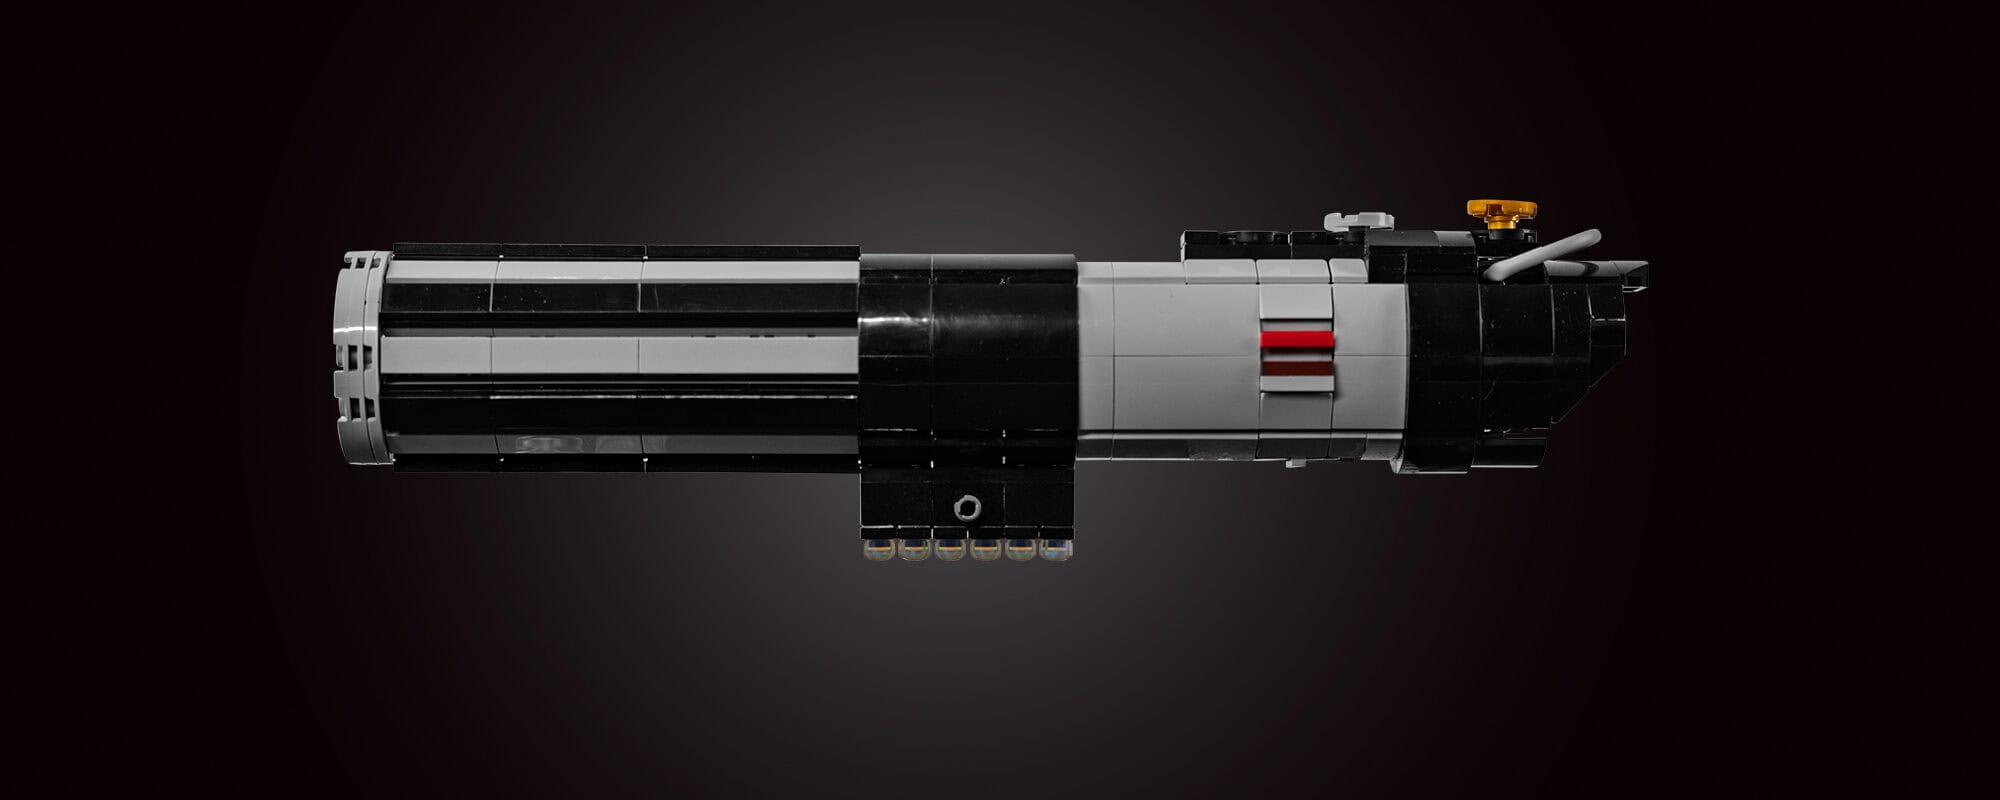
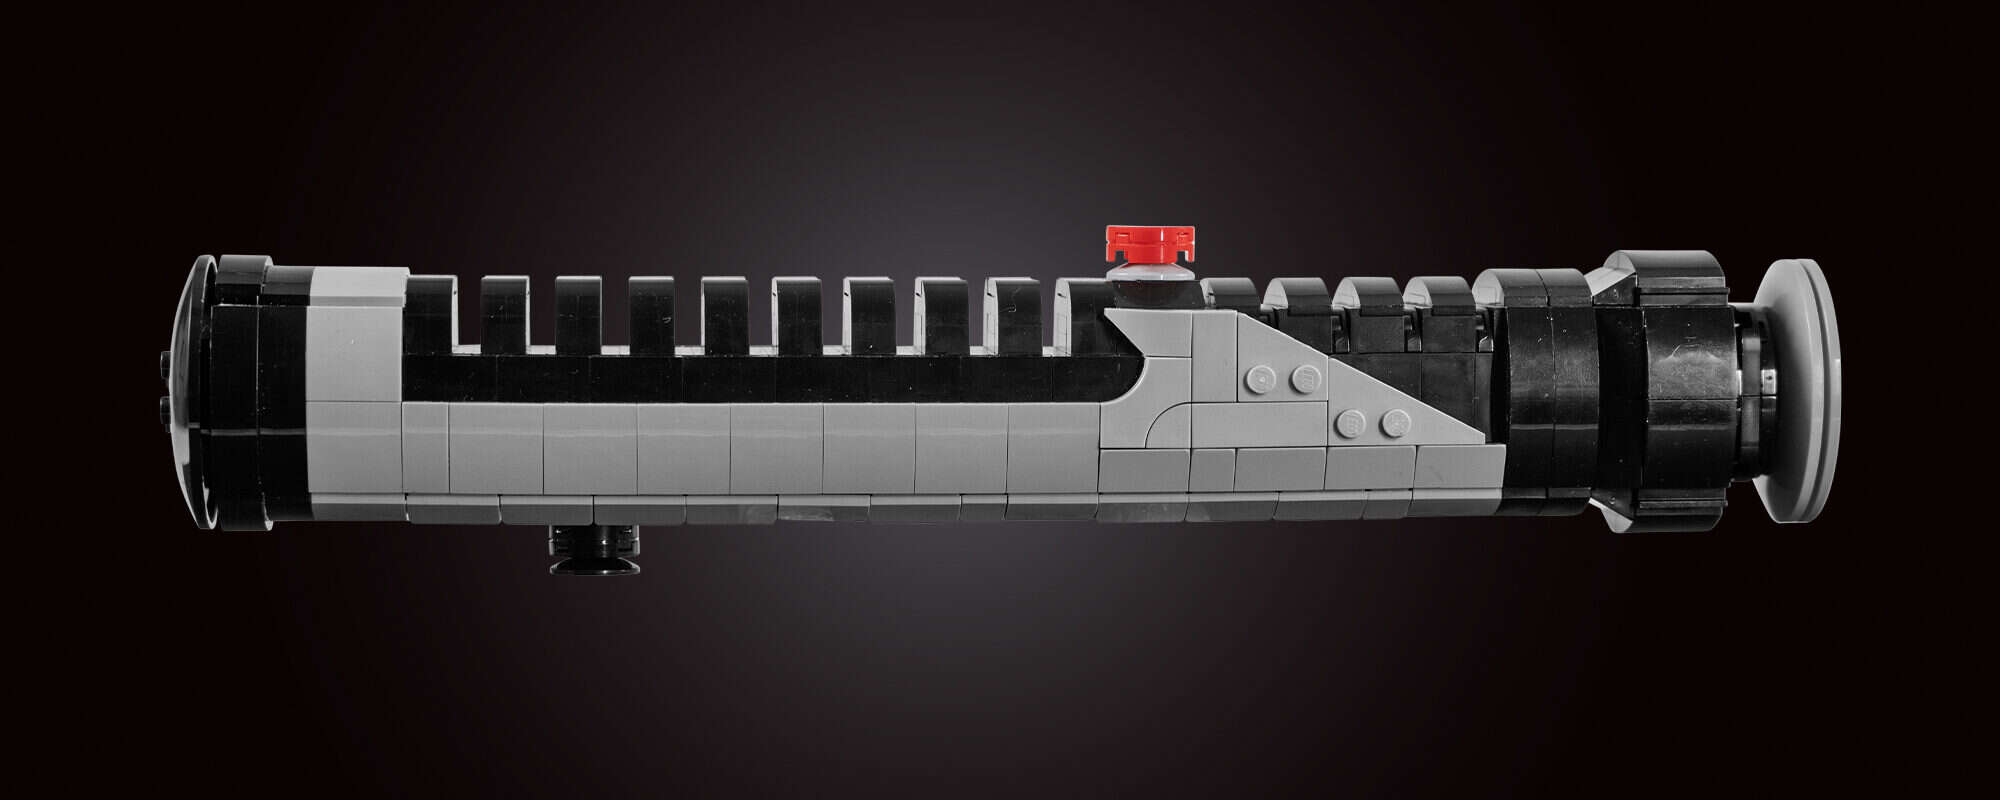
DARTH MAUL'S LIGHTSABER
Maul’s Lightsaber has two nearly identical ends, with minor differences like the belt holder. The halves connect end-to-end using a LEGO Technic™ axle running through the centre.
Each button is mounted on a corner jumper tile and slightly rotated to match the correct angle along the hilt.
The blade emitters use upward and downward-facing round plates for smooth curves in both directions. Over each cone, we added an octagonal-style ring of “metal” strips built from LEGO candle pieces.
LEGO® BRICKS
BUILD HOURS
QUI-GON JINN'S LIGHTSABER
Qui-Gon’s Lightsaber was one of the first we built, and it helped define the style for the rest. With a solid SNOT core, it was sturdy enough to hold and wave around, not that we did that constantly.
The ribbed front texture came from stacked curved LEGO brick assemblies, evenly spaced using SNOT bricks. We used wedge plates and newer, rounded cut-out tiles for the grey side detailing to capture the shaping.
LEGO® BRICKS
BUILD HOURS
KYLO REN'S LIGHTSABER
Kylo Ren’s Lightsaber has a distinct, aggressive design, making it a fun challenge to build. Like Luke and Vader’s hilts, the core is 12-sided, so we reused the same technique with LEGO® NINJAGO™ aeroblade elements nested together.
We used shallow inverted arch slopes to recreate the flared ridges at the base.
The gouge just below the T-junction was tricky. We had to get the shape right using only a few Pearl Gold LEGO parts while keeping the structure strong enough to hold together.
LEGO® BRICKS
BUILD HOURS
REY'S LIGHTSABER
Rey’s Lightsaber was one of the toughest to design, since it only appears briefly in Episode IX.
We used an octagonal LEGO bar plate with eight subassemblies attached around the striped, tapered cones at the top and bottom. Each section is built from wedge plates arranged into a tight parallelogram to minimise gaps in the cone shape.
Our favourite detail? The decorative spikes that pop up when the blade activates are built using 2 x 3 LEGO pentagonal tiles in shiny Metallic Silver.
LEGO® BRICKS
BUILD HOURS
MACE WINDU'S LIGHTSABER
Mace Windu’s Lightsaber posed a challenge due to its distinctive golden sections. The limited selection of Metallic Gold and Pearl Gold LEGO pieces made getting the Saber structurally strong tough, especially the thin 4 x 4 gold section in the middle. To solve this, we threaded a LEGO Technic™ axle through Pearl Gold plates to hold the ends securely together.
Since this was the only purple Lightsaber in the exhibition, we added a hidden easter egg—several purple 2 x 2 pieces inside the core!
LEGO® BRICKS
BUILD HOURS
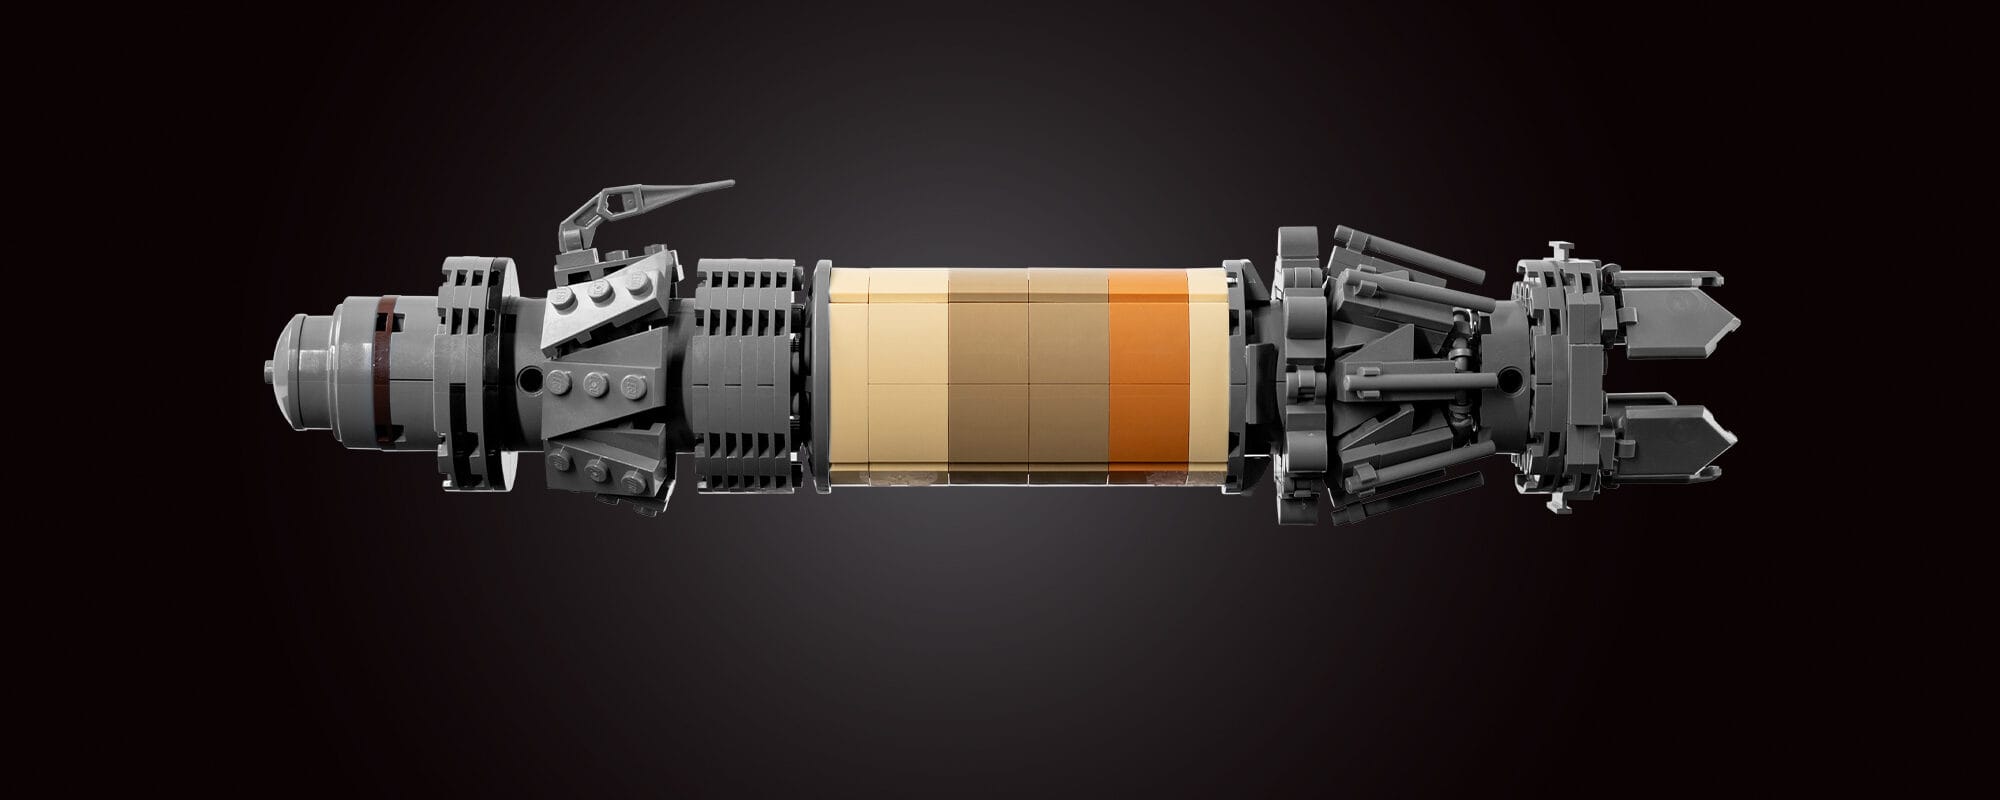
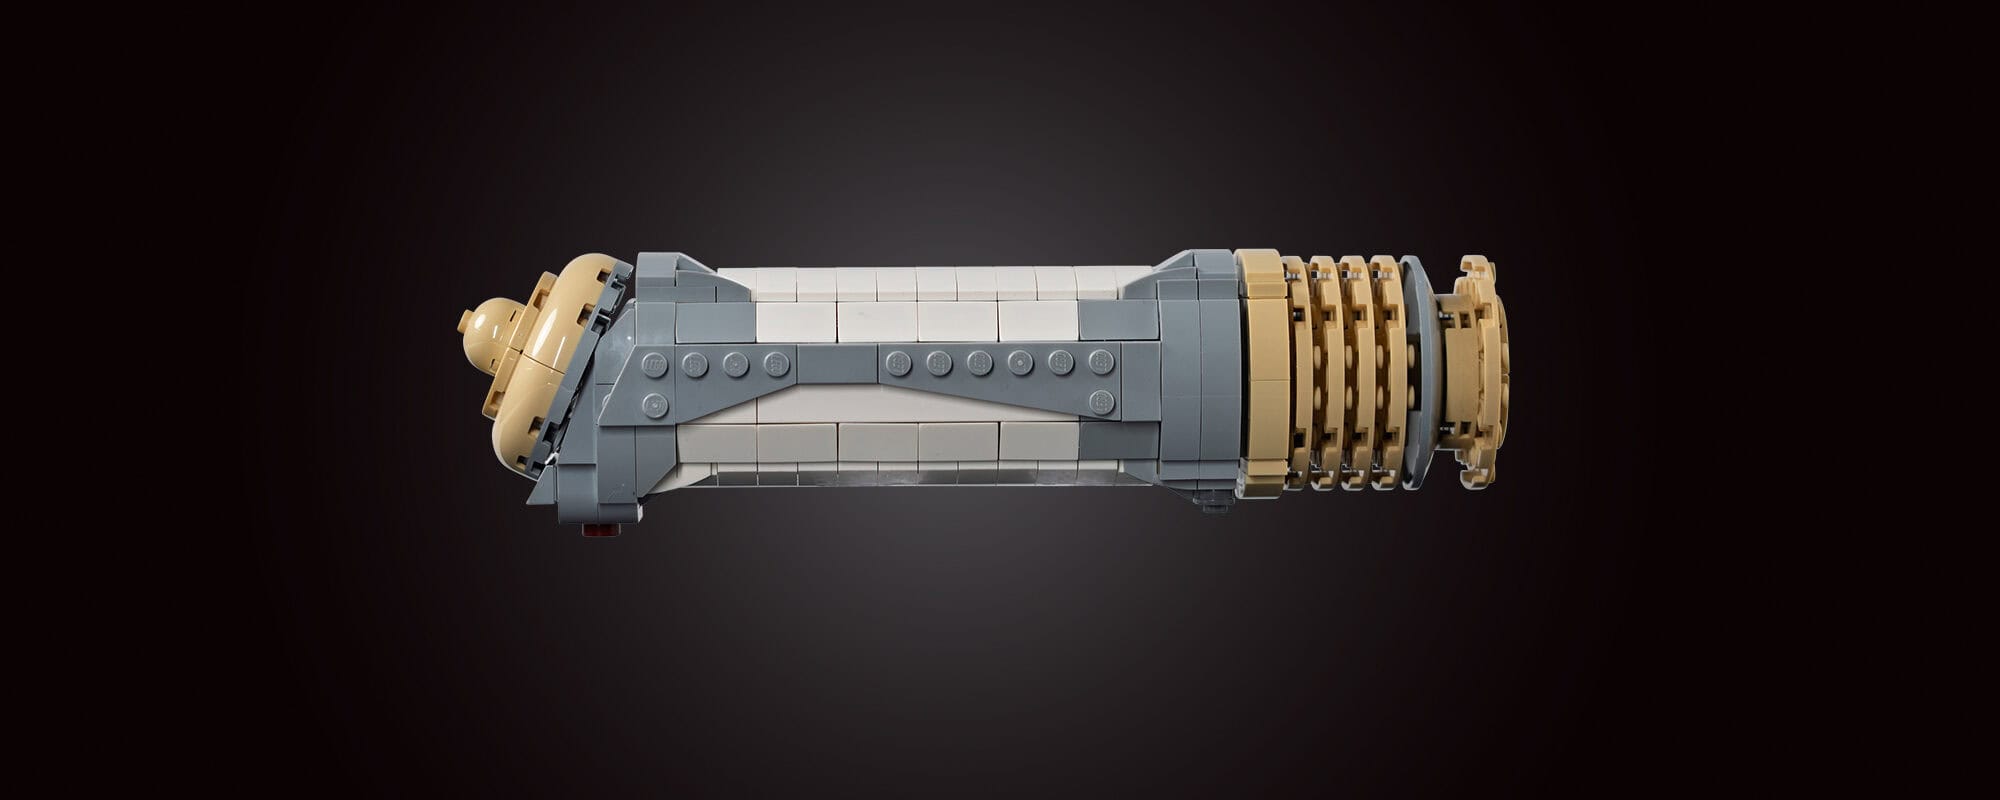
DARTH SIDIOUS'S LIGHTSABER
Darth Sidious’s Lightsaber is thinner than most, which made adding curves and rounding it off a bit trickier, but we started with a solid SNOT LEGO brick core to give it strength.
Replicating the white and grey pattern on the handgrip was crucial, and the SNOT core allowed the pattern to flow seamlessly around the hilt, just like the original.
We had hoped to use gold parts for the emitter and angled end, but we used Brick Yellow as the closest match since the LEGO pieces didn’t come in any gold shades.
LEGO® BRICKS
BUILD HOURS
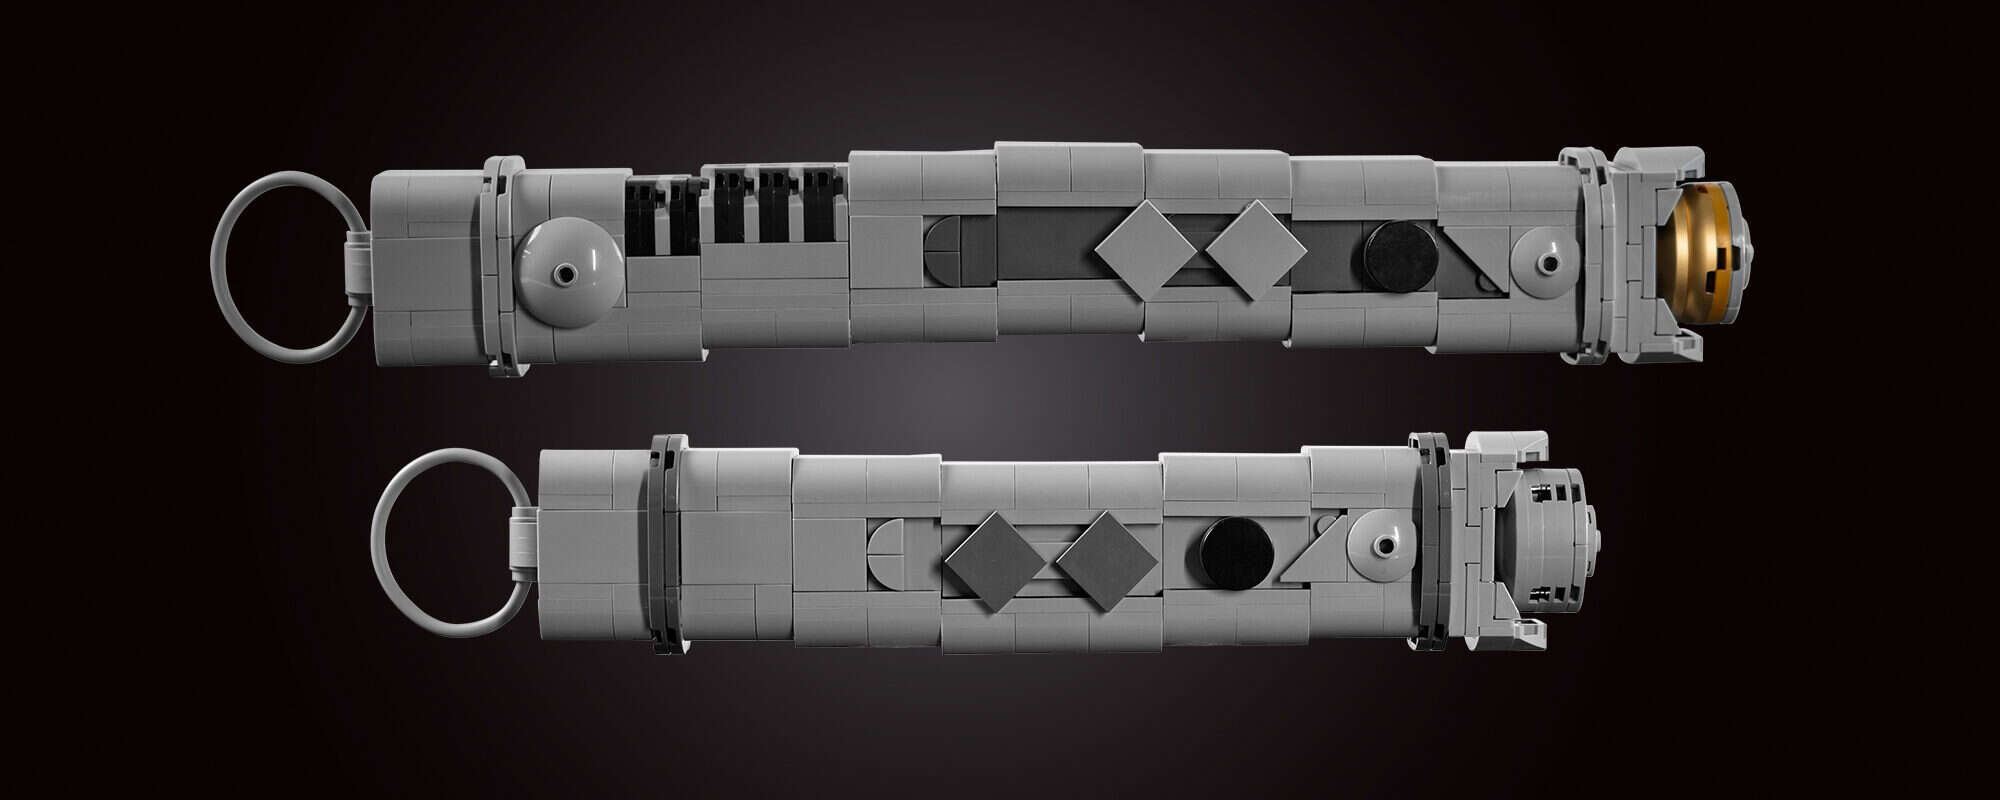
AHSOKA TANO'S LIGHTSABER
The subtle curves of Ahsoka’s hilts were a real challenge! After hours of testing different techniques, we built the Lightsaber in small sections, gradually stepping them in and out using LEGO bracket pieces.
The black bands around Ahsoka’s main Lightsaber required completely redesigning that sub-section. We created a new sub-model to get the correct number of bands, then attached it sideways using SNOT.
Although the two Sabers are different, we were able to apply most of the same techniques to both.
Witness these incredible models and more at the world-first LEGO® Star Wars: The Exhibition! Embark on an epic, hands-on adventure through the Star Wars galaxy – Created by Ryan ‘Brickman’ McNaught and his talented team with over eight million LEGO bricks and 25,000+ build hours.